Second article of a series on enabling modern ALM practices for an Azure Stream Analytics project - focusing on developer experience.
- Part 1 : 100 - The story of 2 pipelines
- Part 2 : 101 - Local developer experience
- Part 3 : 102 - Provisioning scripts and live job
- Part 4 : 103 - Continuous build
- Part 5 : 104 - Automated deployment
- Part 6 : 105 - Unit testing
- Part 7 : Integration testing - to be written
Developer setup
At the moment we don’t need an Azure subscription, since our goal is to start with 100% local development. We do need a free Azure DevOps account, to version control our code using Git.
Since we have chosen VSCode as our IDE, everything that follows should run cross-platform.
Requirements
- Install Git
- Install Visual Studio Code
- Install the Azure Stream Analytics extension
- Open VSCode
- From Extensions on the left pane, search for Stream Analytics and select Install on the Azure Stream Analytics extension
- Note that there are other prerequisites but VSCode should chime in if they are not installed
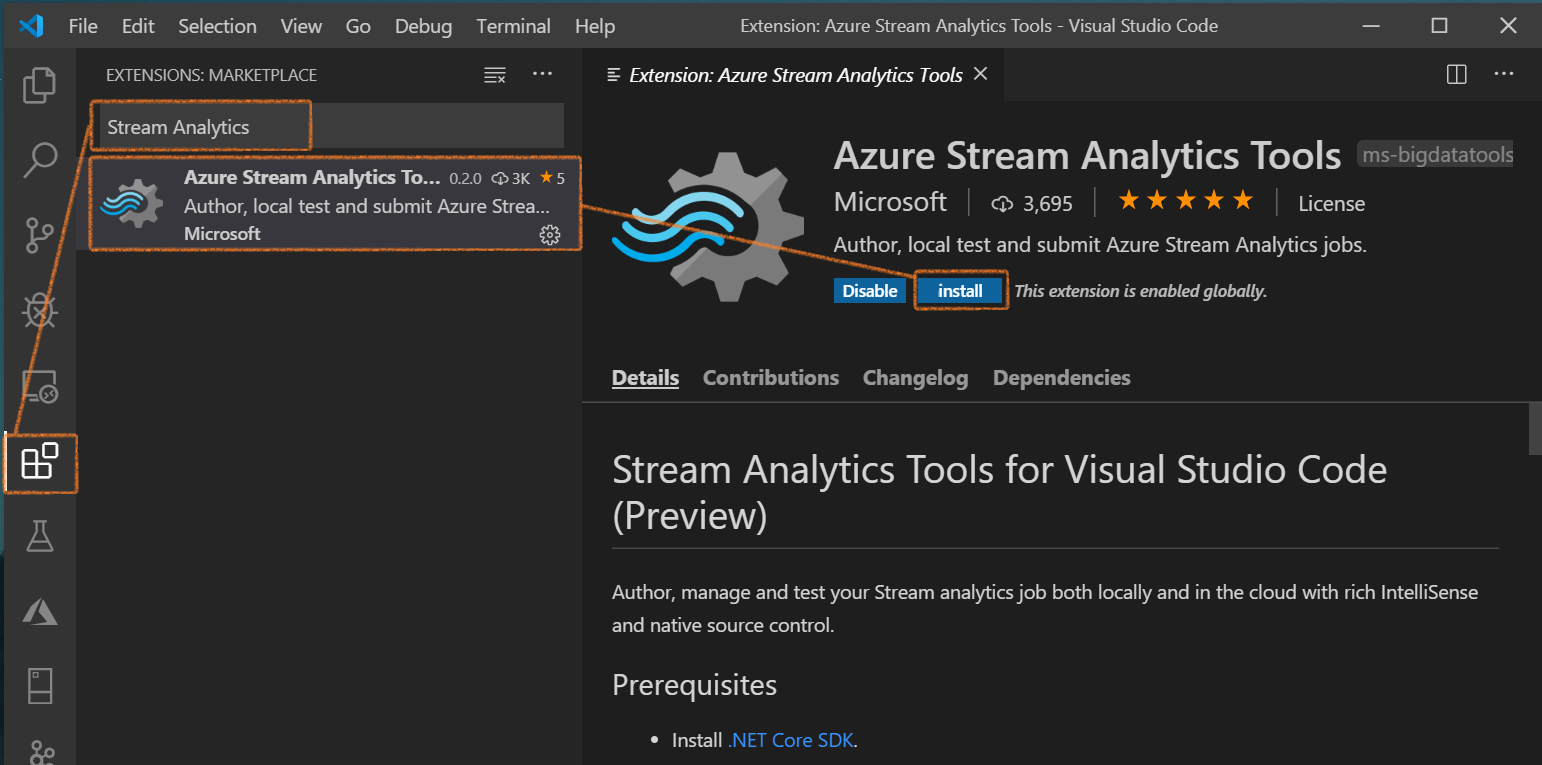
figure 1 - Screenshot of VSCode: ASA Extension
ASA Project
Now let’s create an Azure Stream Analytics project.
To access the commands made available from the ASA extensions in VSCode, we need to use the command palette. Two ways to do that: CTRL+SHIFT+P or via the menu : View > Command Palette. Once it’s up there, we can type ASA create and select the ASA: Create new project option.
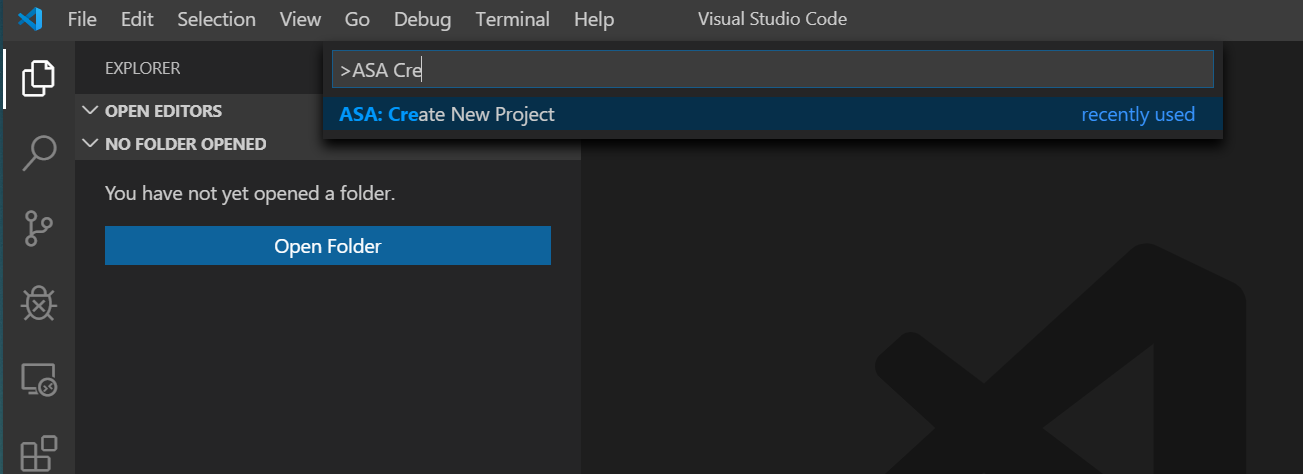
figure 2 - Screenshot of VSCode: ASA charm ~ Create new project
We’ll pick a name for our project (I left the default option, ASATest1), then a folder, and we should end up with the following workspace:
- ASATest1 (project folder)
- Functions (Javascript or C# user defined functions (UDF), we should not use that one anytime soon)
- Inputs (where our input configuration files will live)
- input.json : an empty input configuration file to get us started
- Outputs (where our output configuration files will live)
- output.json : an empty output configuration file to get us started
- asaproj.json : the configuration file of our project
- ASATest1.asaql : our job query
- JobConfig.json : the configuration file of the job, once it’ll be running live (scale, compatibility version, error policy…)
Now that we have that, we should be able to compile these assets into ARM Templates files. From the command palette again, let’s do a ASA Compile Script:
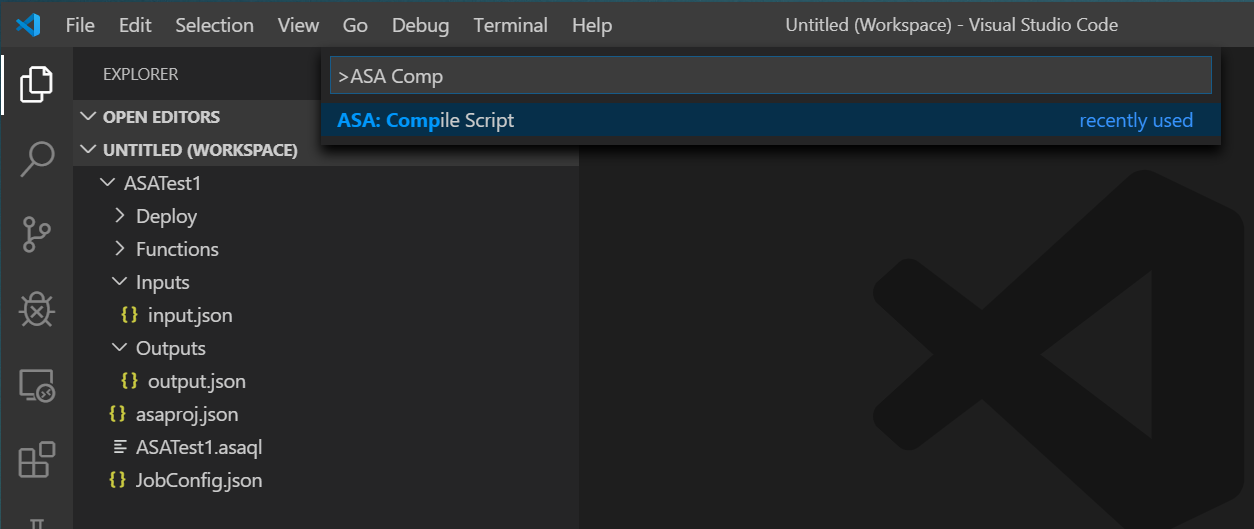
figure 3 - Screenshot of VSCode: ASA charm ~ Compile Script
Which will add the following sub-folder and files to the project:
- ASATest1 (project folder)
- Deploy
- ASATest1.JobTemplate.json : the job definition - we should never edit that file directly, but instead change the source files and then compile
- ASATest1.JobTemplate.parameters.json : the parameters (connection strings…) - we should never edit that file either, we will use variables in the release pipeline to manage those values properly
- …
- Deploy
This will be what we leverage later when we first set up the release pipeline: manual compile step in VSCode, then pushing those files to our repo, which will trigger a build using the ARM template files.
Speaking of our repo, we should set Git up before anything else - well we should have set Git up before even creating the project, but here we are.
Version control with Git
As mentioned before, we will be using Azure DevOps (free account), and in this section we’ll focus on Azure Repos.
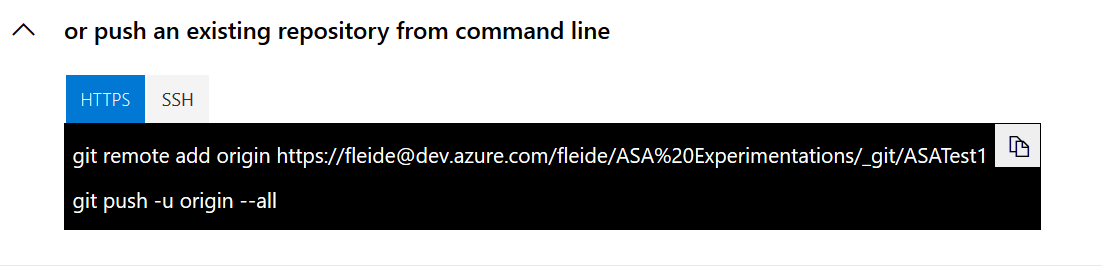
We won’t go through the details, the plan is to first create a DevOps project, then a repository for the files of our ASA project. Since I tend to reserve the base repo (the default one created with the DevOps project) for documentation, we’ll create a new one specifically for our ASA project:

Then:

Once this is done we can grab the origin address from the repo landing page (if that page is not there for any reason, the same https link is available under the Clone option in the top right corner of the repo Files page)
Now that we have the central repo setup, we can initialize the local one, and link it to the origin.
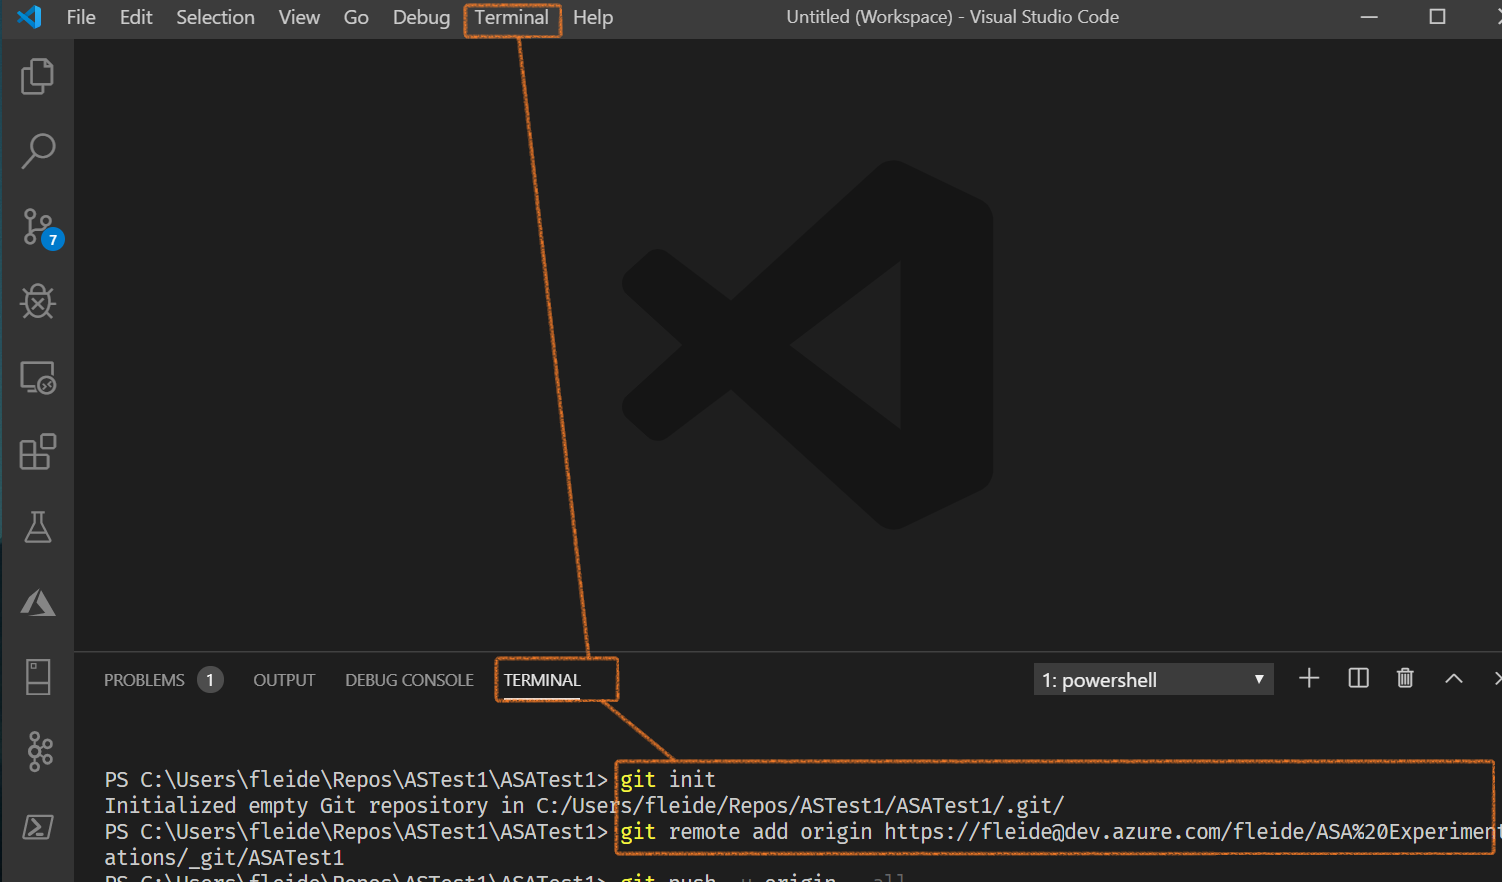
Back in VSCode, we’ll open a terminal and do:
git init
git remote add origin https://xxxx@dev.azure.com/yyyy/zzzz/_git/aaaa
The origin being the one Azure Repos gave us just above.
Now we need to commit our local changes in the local repo first:
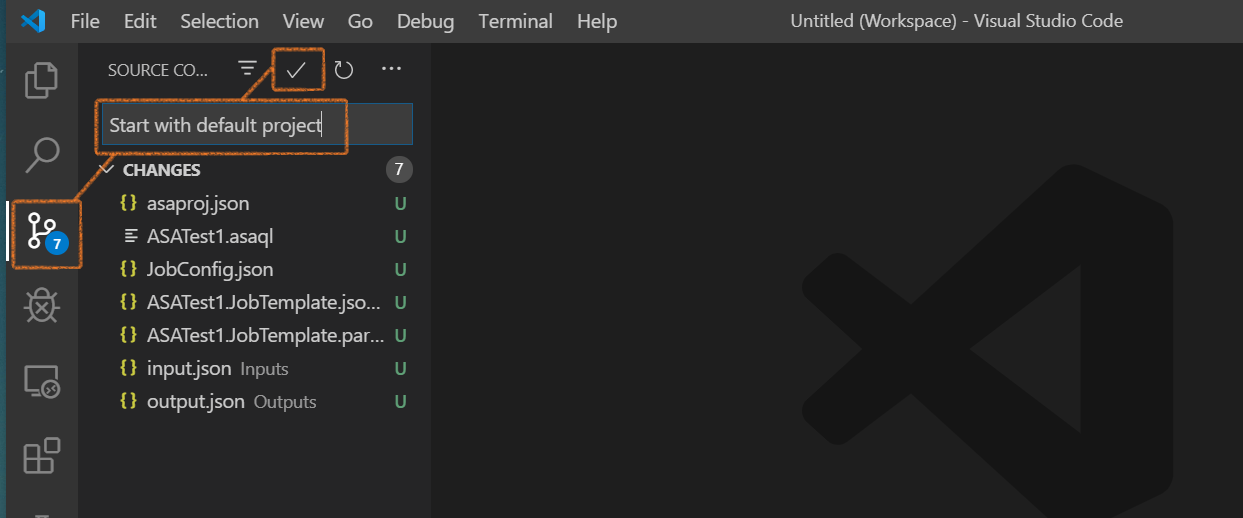
And then push them to origin to see them in Azure DevOps:
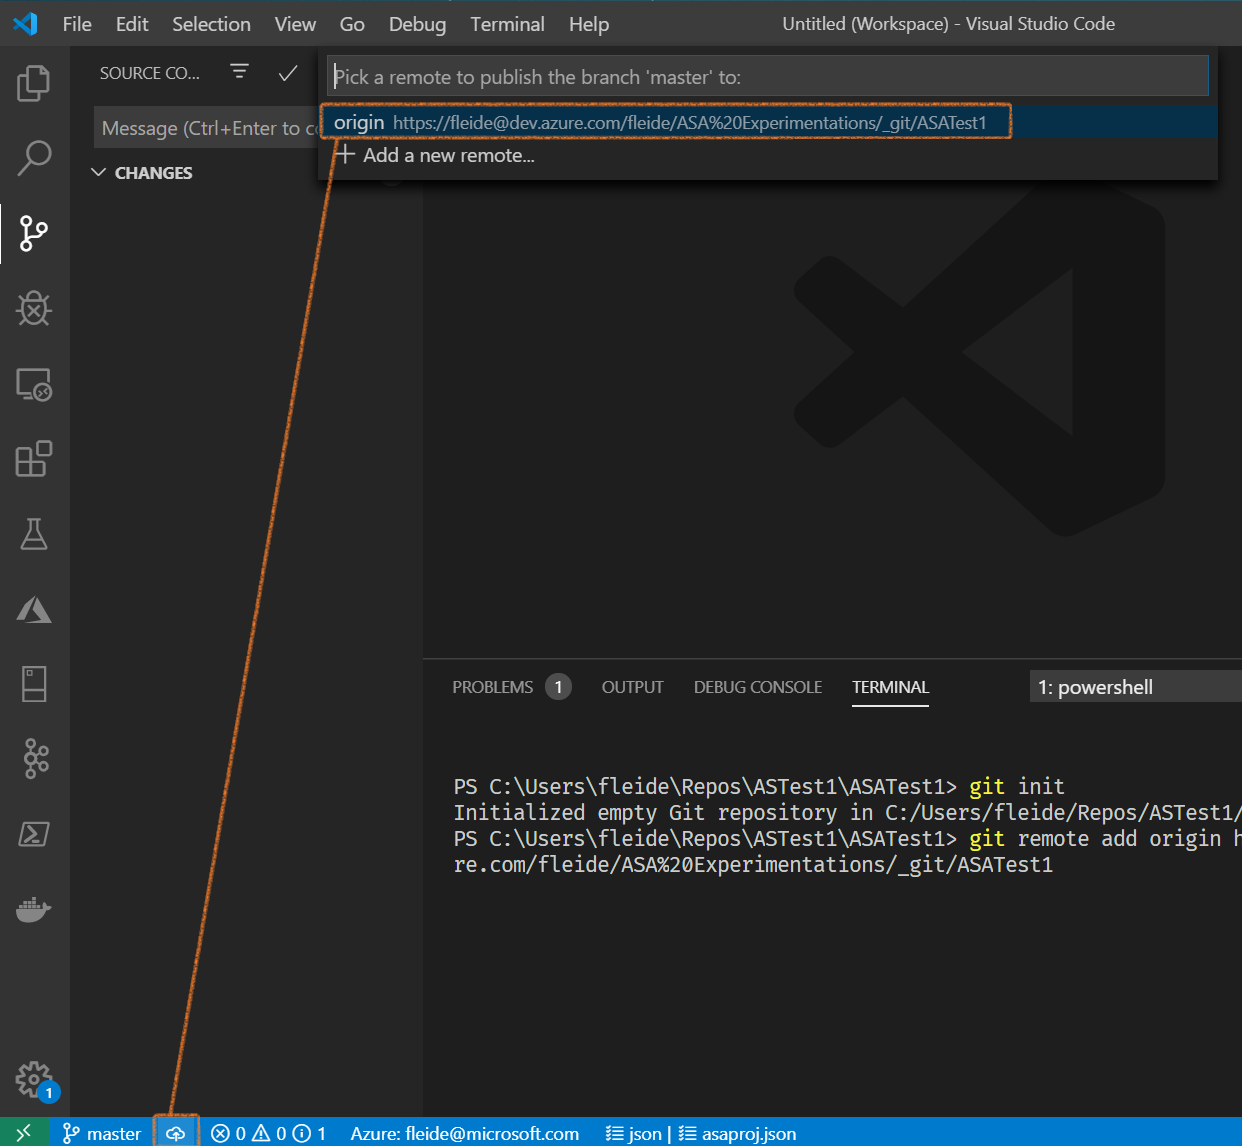
Now if we go back to Azure DevOps, we should see our files there, including the ARM template files:

figure 4 - Screenshot of Azure DevOps: Our files saved in the origin repo
We can add a step to our development process: every time we change our query or ASA config files, we should compile, commit the changes to the local repo, then push those changes to the origin in Azure Repos.
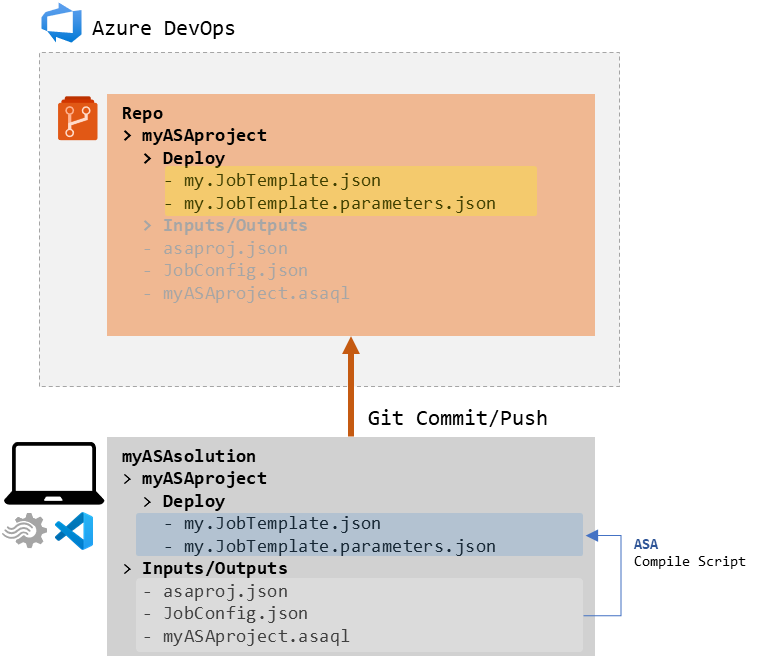
figure 5 - Representation of the initial development workflow
Now that this is done, let’s get back to performing a local run.
Local run
The ASA documentation makes a good tutorial for that part. It comes as a later step of a larger tutorial that has set up a live source a bit earlier, and uses that live output to generate a sample one for the local run. We actually don’t need that.
Let’s create a new text file in VSCode, put data in it, and save it as CSV in our input folder (I named it localdata.csv):
Column 1, Column 2
A,100
B,30
C,150
Then let’s create an ASA input configuration file to match that local data set. We can do that either via the command palette (ASA: Add Input) or right clicking on the input folder. It’s a local input, relevant to our main script (asaql). Once the configuration file is created, we can use the helpers in VSCode to have it point to our CSV file. I’ll name that input column1and2:
{
    "InputAlias": "column1and2",
    "Type": "Data Stream",
    "Format": "Csv",
    "FilePath": "localdata.csv",
    "ScriptType": "InputMock"
}
Note that the name of the config file that was just created is prefixed by Local_, allowing us to have both live and local configuration files for a single input alias. This will come in handy when we want to test a query on a source that exists, but still want to do 100% local runs.
In our query, we will now be able to use the InputAlias from above in the FROM clause:
SELECT
   *
INTO
   [YourOutputAlias]
FROM
   [column1and2]
For local runs we don’t really care about the output alias. The local engine will not honor the output config format that has been defined, and instead use a json file format.
We should now be able to start a local run, either from the command palette with ASA: Start local run, or if the query is open, using the Run locally option available at the top of the screen. We will chose to use the local input, and if it’s the first run, we will have to accept some terms and conditions.
This should open a new tab that displays our execution results:

figure 6 - Screenshot of VSCode: local run result
That was easy!
Each of these runs will generate a sub folder in the new LocalRunOutputs folder. These contain the output file (json format) among other files. If this is very good in order to look back at past run results, this will quickly pollute our repository if we don’t take care of it. A good way to address that is to add a .gitignore file (simple text file) in our project folder, and add LocalRunOutputs/ to it, so it’s excluded from the git process.
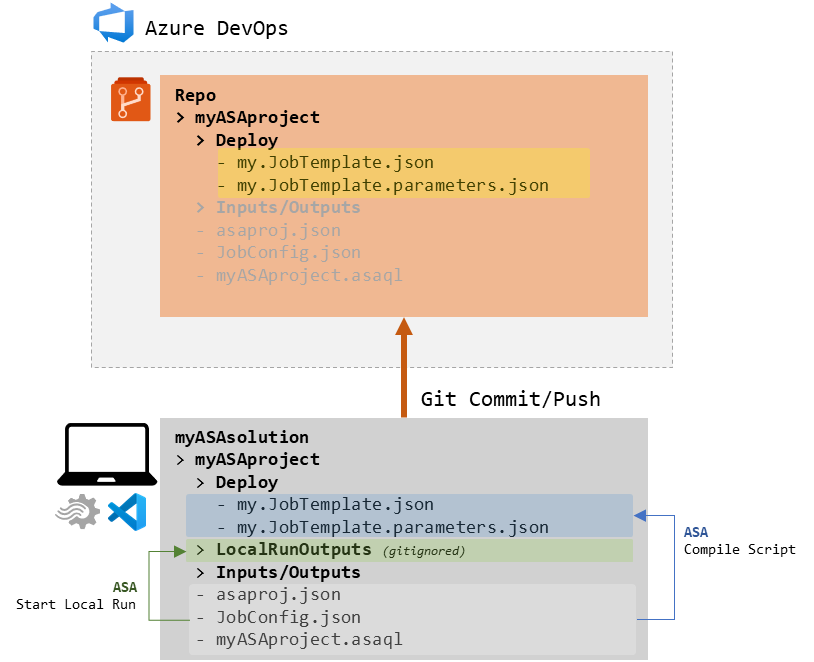
figure 7 - Schema of the current development workflow
Here we have it: a tight local development environment in VSCode, with local execution that requires no Azure resource.
From here, we could set up a build and release pipeline using the ARM templates sitting in the repo. This is not how we will proceed though, as it means having to compile the project manually ourselves every time we change anything in the project. Our next step is to provision an Azure infrastructure, and see how we can move the compile step into a Build pipeline instead later.
Next steps
Part 1: 100 - The story of 2 pipelinesPart 2: 101 - Local developer experience- Part 3 : 102 - Provisioning scripts and live job
- Part 4 : 103 - Continuous build
- Part 5 : 104 - Automated deployment
- Part 6 : 105 - Unit testing
- Part 7 : Integration testing - to be written
